Configuration
Configure the wireless adapter for monitoring
Connect the wireless adapter
-
Power on the Kali VM and login as
assessor -
Plug the
ALFA Atheros AR9271 Wi-Fi USB adapter(or your substitute) into the MIP -
Right click the Kali VM and Connect (Disconnect from host) the device named
Qualcomm Atheros UB91C(or your substitute) under Removable Devices -
Open a terminal window within the Kali and ensure that the wlan0 interface is present:
noteThe first Wi-Fi adapter attached will be assigned the interface name
wlan0. Any additional adapters that are connected will have their appended number increment fromwlan#.sudo iw dev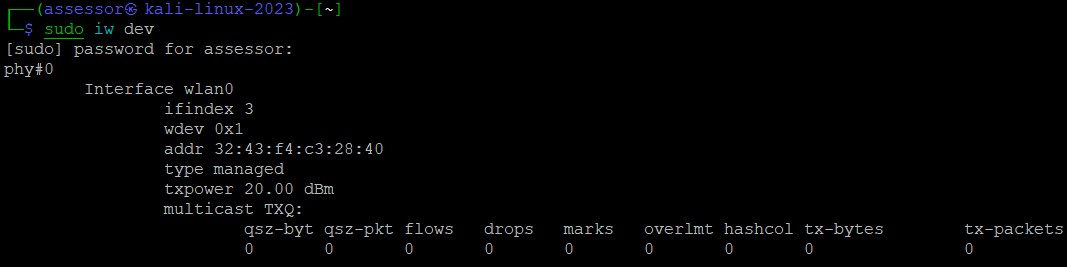
Create a wireless monitoring interface
The monitoring interface is not permanent and will need to be created after every reboot or disconnection of the wireless dongle.
-
Create a virtual monitoring interface
mon0attached towlan0:sudo iw dev wlan0 interface add mon0 type monitor -
Ensure that the
mon0interface has been created:sudo iw dev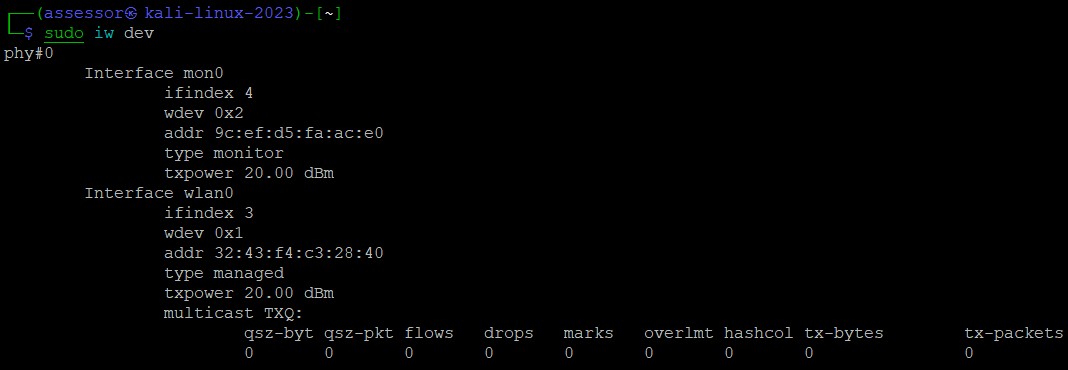
Configure and start the GPS daemon
Connect the GPS dongle
-
Plug the
BU-353S4 GPS USB dongle(or your substitute) into the MIP -
Right click the Kali VM and connect the device named
Prolific USB-Serial Controller D(or your substitute) under Removable devices -
Ensure that the Kali VM has connected the GPS adapter by checking dmesg logs
tip- The first serial USB device that is attached will be assigned
/dev/ttyUSB0. Additional serial USB devices will increment from/dev/ttyUSB#. - A successful connection of the GPS USB device will display similar log messages:
sudo dmesg
NOTE: Some devices may be assigned
/dev/ttyACM#- pay attention to the dmesg logs and use the assigned device. - The first serial USB device that is attached will be assigned
Configure the GPS daemon
-
Set the configuration for
gpsdto utilize the USB device in/etc/default/gpsd(replace/dev/ttyUSB#with the actual device):sudo vi /etc/default/gpsd# Devices gpsd should collect to at boot time.
# They need to be read/writeable, either by user gpsd or the group dialout.
DEVICES="/dev/ttyUSB#"
# Other options you want to pass to gpsd
GPSD OPTIONS="-n"
# Automatically hot add/remove USB GPS devices via gpsdctl
USBAUTO="true -
Start the
gpsdservice:sudo systemctl restart gpsd -
Ensure the
gpsdservice is active and running without error:sudo systemctl status gpsd
Verify GPS connectivity
-
Ensure that GPS is properly communicating by running
gpsmonin a separate tab:note- If the
gpsmonTUI pops up with statistical information and scrolling serial data on the bottom of the screen, this indicates that the GPS adapter is active and sending data. - If
tcp://localhost:2947 Unknown device> JSON slave driver requires 80x1is displayed, you just need to maximize the terminal window
sudo gpsmon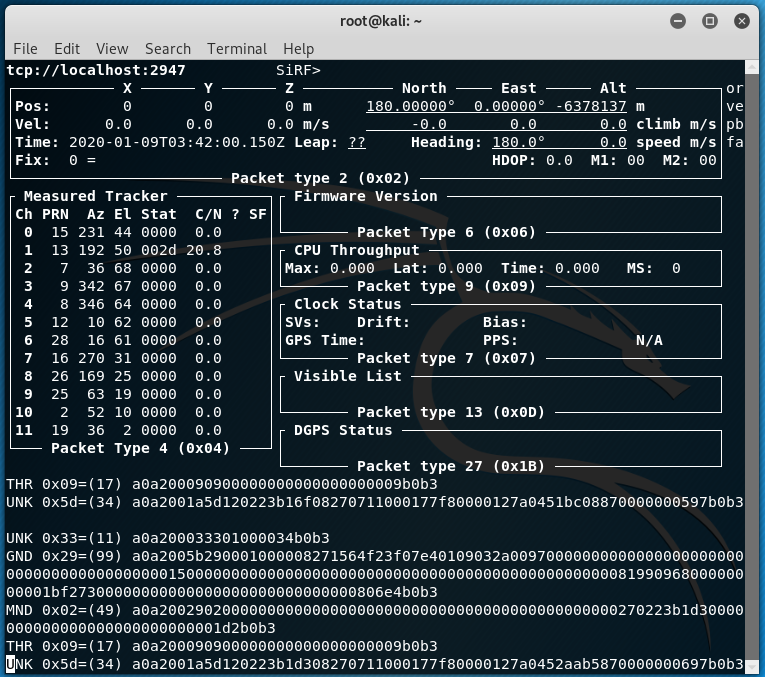
- If the
-
Open
xgpsin a separate tab for visual of GPS satellites and lat/long data:tip- You may need to maximize the window in order to see the GPS Data section
sudo xgps
NOTE: If Latitude and Longitude under the GPS Data section is
n/a, then you do not have a strong enough signal from the GPS satellites
Configure Kismet
Configure GPS and WiFi monitoring settings
- Add the following configuration lines to utilize GPSD and the WiFi monitoring interface in
/etc/kismet/kismet.conf:sudo vi /etc/kismet/kismet.confgps=gpsd:host=localhost,port=2947
track_location=true
source=mon0
Configure logging
- Create the logging directory for Kismet:
sudo mkdir /var/log/kismet